
Create and keep your blog content looking cool and attractive, so one of the easiest ways is with multiple tabs. Using additional tabs in blogger will help you to write long blog posts or articles quickly. The use of HTML & CSS code will allow you to post multiple images or videos at once on your blog. It reduces steps when writing articles, saves you time when creating new posts in your Blogger posts.
With the help of HTML and CSS, Blogger users can create multiple tabs within their blogger posts. Below are full details on creating multiple Responsive tabs in blogger.
Curious to know with this multi tab, let's see more in the review below:
How to Create Responsive Multi Tabs on Blogger
- Go to your blogger account dashboard
- Go to the posts section and create a new post.
- Create a new page & put the following HTML & CSS code given below before or the top of </style>
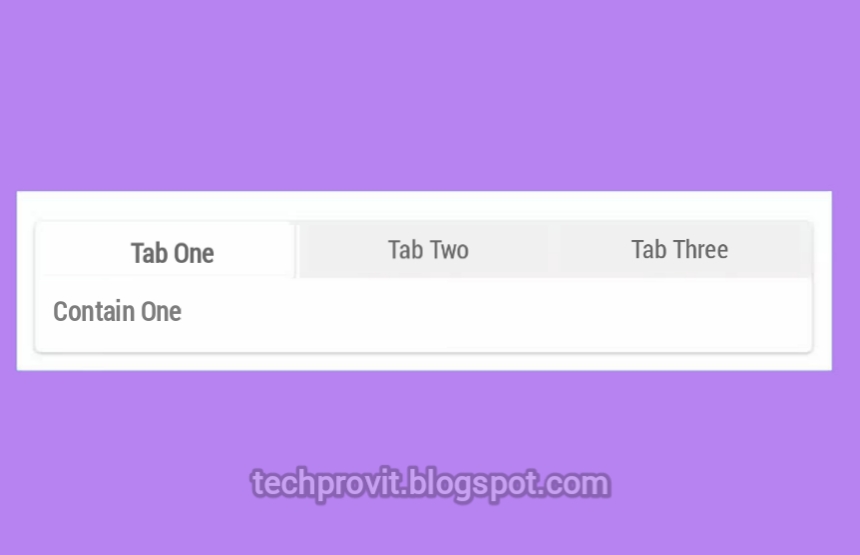
Style #1
/* Multi Tabs CSS Only by igniel.com */
.ignielMultiTab {
  border: 0;
  margin: 1.5rem 0;
  padding: 0;
}
.ignielMultiTab input, .ignielMultiTab .content div {
  display: none;
}
.ignielMultiTab label, .ignielMultiTab .content {
  border-style: solid;
  border-width: 1px;
}
.ignielMultiTab input:checked + label, .ignielMultiTab .content {
  border-color: #ddd;
}
.ignielMultiTab .label {
  display: flex;
  flex-wrap: nowrap;
  flex-direction: row;
  max-width: calc(100vw - 2.5rem);
  overflow: auto;
}
.ignielMultiTab label {
  background-color: #ededed;
  border-color: transparent;
  border-bottom: 1px solid #ddd;
  color: #666;
  cursor: pointer;
  display: inline-block;
  float: left;
  padding: .65rem 1.25rem;
  position: relative;
  top: 1px;
  transition: all .3s ease;
}
.ignielMultiTab input:checked + label {
  background-color: transparent;
  border-bottom: 1px solid #fff;
  color: #1d1d1d;
  font-weight: bold;
}
.ignielMultiTab .content {
  clear: both;
  padding: 1.5rem 1.25rem;
}

.ignielMultiTab #tab1:checked ~ .content .tab1,
.ignielMultiTab #tab2:checked ~ .content .tab2,
.ignielMultiTab #tab3:checked ~ .content .tab3,
.ignielMultiTab #tab4:checked ~ .content .tab4,
.ignielMultiTab #tab5:checked ~ .content .tab5 {
  display: block;
}- Then copy the HTML code below and paste it in your new post earlier.
<!-- Multi Tabs CSS Only by igniel.com -->
<fieldset class="ignielMultiTab">

  <input id="tab1" name="mTab" type="radio" checked="checked"/>
  <label for="tab1">One</label>

  <input id="tab2" name="mTab" type="radio"/>
  <label for="tab2">Two</label>

  <input id="tab3" name="mTab" type="radio"/>
  <label for="tab3">Three</label>

  <input id="tab4" name="mTab" type="radio"/>
  <label for="tab4">Four</label>

  <input id="tab5" name="mTab" type="radio"/>
  <label for="tab5">Five</label>

  <div class="content">

    <div class="tab1">
      (1) CONTENT ONE
    </div>
    <div class="tab2">
      (2) CONTENT TWO
    </div>
    <div class="tab3">
      (3) CONTENT THREE
    </div>
    <div class="tab4">
      (4) CONTENT FOUR
    </div>
    <div class="tab5">
      (5) CONTENT FIVE
    </div>

  </div>
</fieldset>- Then save and see the result
Style #2
<div class="tab-wrap">
<input checked="" class="tab" id="tab1" name="tabGroup1" type="radio" />
<label>Section One</label>
<input class="tab" id="tab2" name="tabGroup1" type="radio" />
<label>Section Two</label>
<input class="tab" id="tab3" name="tabGroup1" type="radio" />
<label>Section Three</label>
<div class="tab__content">
<h3>Section One</h3>
</div>
<div class="tab__content">
<h3>Section Two</h3>
</div>
<div class="tab__content">
<h3>Section Three </h3></div></div>
Style #3
- Copy and paste the following code in above of ]]><b:/skin>
/*----- XOMISSE Multi-Tabbed Content -----*/
ul.xo-tab-links {
	margin: 0 auto;
	padding: 0;
	list-style: none;
}

ul.xo-tab-links li {
	background: none;
	color: #222;
	display: inline-block;
	padding: 10px 20px;
	cursor: pointer;
	transition:all linear 0.15s;
}

ul.xo-tab-links li.current {
	background: #f8f8f8;
	color: #333;
}
.xo-tab-content {
	display: none;
	background: #f8f8f8;
	padding: 20px;
}

.xo-tab-content.current {
	display: inherit;
}
- Then add the JQuery code above of </head>
<script src='https://ajax.googleapis.com/ajax/libs/jquery/1.6.1/jquery.min.js' type='text/javascript'/>
<script type='text/javascript'>
(function($) {
$(document).ready(function(){
$('ul.xo-tab-links li').click(function(){
var tab_id = $(this).attr('data-tab');
// Make the old tab inactive.
$('ul.xo-tab-links li').removeClass('current');
$('.xo-tab-content').removeClass('current');
// Make the clicked tab active.
$(this).addClass('current');
$("#"+tab_id).addClass('current');
})
})
})(jQuery);
</script>Make a Multi Tabs
- Make a new or an exist post of blog
- Paste the following html on a post.
<div class="xo-tabs">

   <ul class="xo-tab-links">
      <li class="current" data-tab="tab1">TAB ONE LABEL</li>
      <li data-tab="tab2">TAB TWO LABEL</li>
      <li data-tab="tab3">TAB THREE LABEL</li>
      <li data-tab="tab4">TAB FOUR LABEL</li>
   </ul>

   <div id="tab1" class="xo-tab-content current">
	YOUR CONTENT HERE
   </div>
   <div id="tab2" class="xo-tab-content">
	YOUR CONTENT HERE
   </div>
   <div id="tab3" class="xo-tab-content">
	YOUR CONTENT HERE
   </div>
   <div id="tab4" class="xo-tab-content">
	YOUR CONTENT HERE
   </div>

</div><!-- xo-tabs -->
.jpeg)


.png)

.jpeg)


.png)

0 Komentar